Well, friends, I can say this is a great recipe to start with on Pinned Foodie!
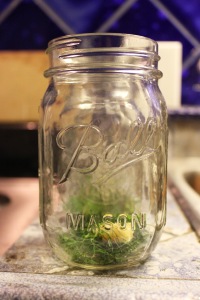
Let me guess what you’re thinking right now. You see the word pickles. I bet you’re already thinking this is too complicated and that you’ll have to can. Settle down, cowboy. THERE IS NO CANNING INVOLVED! You will need mason jars, however. And if you are like me, you might have some mason pint jars hidden in your closet underneath your formal dresses! Well, maybe you don’t, but you can get some easy. Canning and mason jars are all the rage right now. You can find them at any Target or Walmart for pretty cheap. Keep them around after you’ve pickled to use for drinks or maybe a green alternative for food storage. In all honesty, the brands don’t matter too much. All mason jars are pretty much made the same if you aren’t a canner.
I have been dying to make pickles, and this recipe does not disappoint. I happened to find this on Pinterest when browsing (like almost all of the recipes I have) and thought I could finally do it. They are absolutely delicious and were devoured by the Boyfriend, who looked at me with earnest last night and said, “These are really good.” Coming from a former picky eater/pickle lover, I would say that’s a raving review.
Author: Prudent Garden by Debbie posted on June 29th, 2015
3 lbs pickling cucumbers
1 1/2 cups vinegar (white or cider)
1 1/2 cups water
2 tbsp salt (pickling or kosher)
1 chili pepper (Debbie suggested a Serrano, but says jalapeno will do as well)
3 tsp dill seed
3 cloves of garlic
3 glass pint canning jars with lids
1. Wash and slice the cucumbers lengthwise (trim the top and bottom, they are bitter)
2. Sterilize the glass canning jars in boiling water. Remove them from the hot water and set them on the counter.
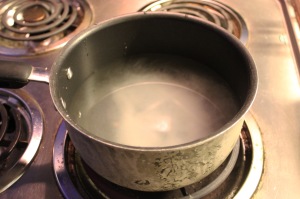
3. Add the water, vinegar, and salt in a sauce pan and bring to a boil. Mix it until the salt dissolves.
4. Add a clove of garlic and a teaspoon of dill seed to each pint jar.
5. Slice the chili and divide among the jars.
6. Pack in the sliced cucumbers and pour the brine on top. Make sure to keep a half-inch space at the top.
7. Put on the lid and let it sit for 48 hours in the fridge. They will last up to 2 months.
Now, let’s break this down, shall we? The following are the steps I took to make the perfect, easy, no canning needed pickle. PRO 1: THESE PICKLES ARE ABSOLUTELY DELICIOUS AND WORTH EVERY MOMENT. IN CASE YOU DIDN’T FIGURE THAT OUT YET.
I have to be quite honest, especially since this is my first whack at pickles, I have no idea what a pickling cucumber is. Aren’t they all created equal? Now, I have to be even more honest and admit the ugly truth. *AHEM* (long, drawn out pause for dramatics) I loathe cucumbers. Yes, I, Pinned Foodie author, hate cucumbers. CON (OR PRO FOR MOST PEOPLE) 1: THE SMELL OF CUCUMBERS WHEN YOU’RE CUTTING THEM. IT FILLED MY TINY APARTMENT AND KILLED ME SLOWLY. (I am obviously not really dead.)
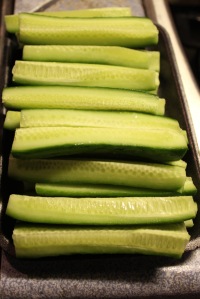
But I love pickles, so perhaps I need to learn what a pickling cucumber is. Does anyone really know? When I was in the grocery store trying to find out what a “pickling cucumber” was, I stopped wracking my brain and went with a mini cucumber. These, for two packs, cost me a total of maybe $7.00. RECIPE SUGGESTION 1: PICK WHATEVER CUCUMBER YOU LIKE, HOWEVER SMALLER IS BETTER. Once I got home with my “minicumbers,” I followed step one accordingly. I decided to quarter them instead of going with halves. I like spears a little better, plus I thought I could probably get more bang for my buck with eventually sixteen spears per jar.
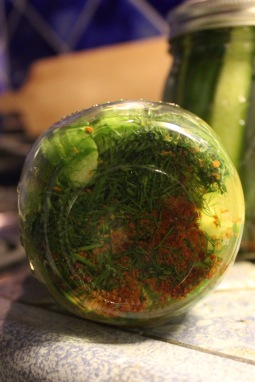
As soon as my cucumbers were cut up, I added my dill, garlic, and pepper (which I will address next) onto the bottom of the mason jar. This is really important! You NEED to put all of this stuff at the bottom. RECIPE SUGGESTION 2: FOLLOW THE INSTRUCTIONS ON THIS ONE! PUT YOUR SEASONING AT THE BOTTOM!
Dill seed is not something we can come by easy for those of us who don’t grow gardens. Which I assume is a great many of us. Since we live in a city. With crappy dirt and dirt options. I happened to have the actual dill herb from a previous Pinterest recipe, however. Let me tell you in advance, if you have never chopped up dill, it makes a huge mess. The little leaves go everywhere. It is the glitter of the kitchen. And glitter mass multiplies like rabbits. Besides it making a huge mess, once you chop it up, it yields a TON! You can keep dill in the fridge for two weeks. RECIPE SUGGESTION 3: GO WITH DILL HERB.
While we are still on the seasoning section, let’s talk about the chili pepper.
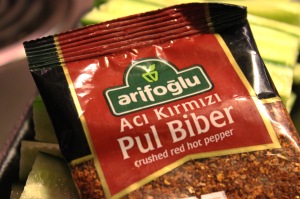
As the author on the Prudent Garden suggests, you can really use any pepper, including crushed red pepper. I would love to have gone with a Serrano or jalapeno. But I tend to rub my eyes or nose after cutting onions, peppers, really anything that causes pain and discomfort to my extremities. To avoid that (and more cutting, because let’s be honest, I’m a lazy human being sometimes), I decided to go with a crushed red pepper I’ve been hoarding since April. This is a Turkish crushed red pepper courtesy of my aunt who visited there recently. It is a little bit finer than, let’s say, McCormick. But it honestly turned out to not be much hotter. I put half a teaspoon in each jar. RECIPE SUGGESTION 4: IF YOU ARE A LAZY, ACCIDENT PRONE, OR WANTING TO KNOW THE KIND OF HEAT YOU’RE PUTTING IN, USE CRUSHED RED PEPPER. PRO 2: IF YOU HAVEN’T CAUGHT ON BY NOW, THIS RECIPE IS FLEXIBLE. YOU CAN CHANGE ANY OF THE INGREDIENTS.
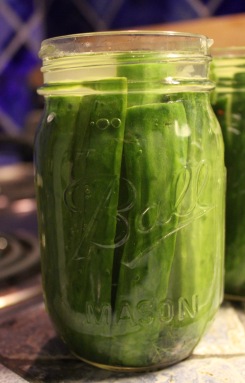
Now, before you make the brine, pack those cut cucumbers in tight. Really, REALLY tight. Remember my projected sixteen spears per jar? I packed my future little pickles so snug, eight spears got left out. Con 2: No directions saying to cut your little green babies into spears or halves, just lengthwise. I know that’s a little nit-picky, but in the end, it cost some of my dudes to be left out, which translates to wasted. This was perhaps one of the hardest steps, as you try to cram every one of your cuts into the jar. You aren’t hurting them, so jam them in until there’s no more room.
Time to make the brine. I am a huge sea salt fan. Instead of wasting money on pickling or kosher salt, I swapped for sea salt. RECIPE SUGGESTION 5: USE ANY SALT YOU WANT. The quality of vinegar does not matter too much. I used a store brand white vinegar, and they still turned out AWESOME!
As soon as that brine has the salt all dissolved, pour that sucker over your packed little babies, top it, then lock it…That means put the lid over it.
Let’s play that game again where I read your mind. You’re looking at the now tightly packed, tightly lidded jar thinking they look so beautiful. Then (perhaps like me) you think, “All the good stuff is at the bottom…” You feel a panic wash over you as you realize you spent good money and time on this recipe. Now, all the good stuff is at the bottom! DEAR CHEESUS, WHY?!
Okay, maybe you didn’t react like I did, but in case you are wondering what will happen with all the good things at the bottom, fear not. PRO 3: THIS AMPS UP YOUR FLAVORS.
Say bye-bye to your pickle puppies for 48 hours. They’re on fridge lockdown. You need to put them in while the brine is still hot. CON 3: YOU WILL BE TEMPTED TO TAKE A TASTE. Don’t. Do. It. As my worry for the bottom swelled in me, I decided I would need to shake the jars every so often to get all the good stuff around. This is extremely unnecessary. However, it taught me that it all breaks up with the brine and starts to infuse the brine, which therefore infuses your pickles. Pro 4: BY POURING IN THE HOT BRINE THEN STICKING THEM IMMEDIATELY IN YOUR FRIDGE, YOUR JARS WILL SEAL THEMSELVES. Look, Mom! I canned without any real effort on my part! No, really, Mom, look, because I told you these bad boys were good.
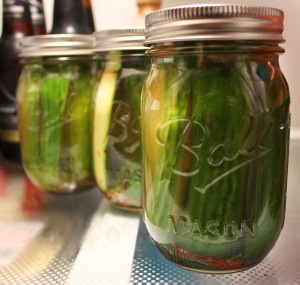
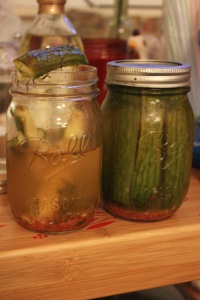
Over forty-eight hours later, I get a beautiful pickle and an already almost empty jar to show how good they were. That almost empty jar had just been cracked open at 10 AM that morning, and by 6 PM, there were only 3 pickles left. That’s why you have three jars worth. And the taste? Just like a good ol’ dill pickle with a little kick. Next time, I’ll be adding a little bit more crushed red pepper. But this brings me to: FINAL SUGGESTIONS BY A FOODIE!
SUGGESTION 1: I’ll be making a sweet dill pickle next time around. 1/2 tsp of sugar instead of the spice.
SUGGESTION 2: Add some veggies, like onion, carrots, or even bell peppers.
What worked in this recipe: The flexibility, the self-sealing cans, and the waiting time for your delicious pickles
What didn’t work: The smell of cucumbers and the lack of cutting instructions (in terms of spears or halves)
Pinned Foodie’s revised recipe:
3 lbs pickling cucumbers
1 1/2 cups white vinegar
1 1/2 cups water
2 tbsp sea salt
1/2 tsp and a pinch of crushed red pepper, per jar
3 tsp dill
3 cloves of garlic
3 glass pint canning jars with lids
1. Wash and slice the cucumbers in half lengthwise (trim the top and bottom, they are bitter)
2. Sterilize the glass canning jars in boiling water. Remove them from the hot water and set them on the counter.
3. Add a clove of garlic, a teaspoon of dill seed, and crushed red pepper to each pint jar.
4. Add the water, vinegar, and salt in a sauce pan and bring to a boil. Mix it until the salt dissolves.
5. Pack in the sliced cucumbers and pour the brine on top. Make sure to keep a half-inch space at the top.
6. Put on the lid and let it sit for 48 hours in the fridge. They will last up to 2 months.
For the cons being mostly nit-picky problems, I’d say this recipe is an A+! Well done, Debbie from Prudent Garden! Did you get enough to eat?

These pickles could make a cute little gift for the holidays!
LikeLike
Yes! And for those of you already considering making these for such an ocassion, I came upon red or purple colored lids for your mason jars. You can personalize the jars this way, or, as I’ve done for my drinking glasses, paint a small swath of chalk paint on them. You can write a personalized message or the date your pickles were made.
LikeLiked by 1 person